1. Introduction
You can use these nodes to send a message or a message with options to the user.
2. Send Message with option
a) Message
Add a message or a label for the options to be added below.
b) Actions
Choose the required action(s) to be taken for the selected option. This includes:
Trigger a Path – Select this option, if you would want to trigger a new path of node, on the selection of an option by the user. Set an Attribute – Select this option, if you would want the selected option value to be saved as an attribute to be used further in the conversation flow.
If this option is selected, remember to provide an attribute name as well. This attribute will store the value of the option selected by the user.
c) Default display mode
Select a suitable display mode for the options from
Buttons – show the options as buttons to click on
Dropdown – show a drop-down in the typing area. This option applies only to the website chatbot. For other channels, this option is ignored and the options are displayed in the standard format for the channel.
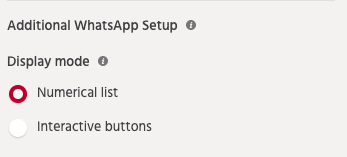
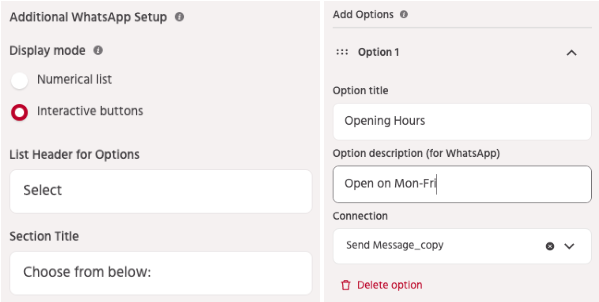
d) Additional WhatsApp setup
-
Display mode
1) Numerical list
The options would be displayed as a single list and these options would be non-clickable.


2) Interactive buttons
The options would be displayed as a list with interactive buttons. You can also add some additional options such as a list header, section title, and option description to make it more interactive and informative for the user.

e) Validation
Use the options here to decide, how is a user response handled when it does not match one of the available options.
Default – If selected, the bot will ignore user input if it does not match the options configured and will continue with the flow. That essentially means the next node is configured within the flow or else if none is configured then forward it to the NLP Engine for processing & response.
Validate Once – If selected, the bot will show a predefined validation message (only ONE time) if the user input does not match with the configured options. Else it will continue with the flow.

Force Validation – If selected, the bot will show the predefined validation message and block the conversation flow until the user provides input that matches the configured options
Few pointers:
Enabling Trigger Path and Set attribute allows you to use the Button Format.
Enabling Trigger Path and Dropdown Menu allows you to use the Dropdown Menu with two kinds of formats ( List and Import). List View – The options added will be shown in a list format. Import – You can import a set of options that will be presented in List format
Enabling only the Set attribute allows you to use Multi-select.
Drag and Drop buttons
You can drag and drop the option buttons in SMO/Carousel node to change the order of options.

3. Multi-Select Options in SMO
To enable Multi-Select kindly uncheck the “Trigger Path”, check “Set Attribute” and assign a value for your attribute:
User Prompt
The content in this option would notify your users that they can select multiple options after overtime they have clicked an option, the process would end when the User has selected the Done button which would be displayed to the user after the first option has been selected.
Done button title
You can enter a value in the “Done button title” which would indicate the user for ending the process of adding the options.
The values for the options clicked will be stored in the assigned attribute and the process would end when the user clicks on the “Done” button.
4. Dynamic SMOs
The dynamic SMO (Send Message with Options) node provides even greater flexibility, by allowing flow builders to construct options by using API responses. This dynamic functionality enhances the customization capabilities and makes it easier to tailor the node based on external responses.
1. Choose the ‘GET’ call in your JSON API node and Declare the array attribute.
2. Select the Source as ‘Dynamic List’ in the SMO Node.
3. Choose the declared Array Attribute from the dropdown list.
4. Use the following notation $ARRAY.<key>$ in your option fields. Here <key> refers to the field name in the object.
This is how it appears on the chat screen:

